Hello guys.... I am back again with an another post. Guys if you have requirement like create a custom web page or you want to apply HTML and CSS then you are at right location, Here i will show you how to apply them and create a custom web page.
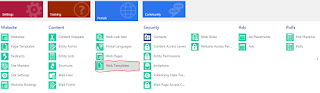
Step 1: Go to Portal > Web Template.
Step 2: Create a new Web Template. Give some Name and Select the website for which you are doing this.

Step 3: Now copy the below code and paste it in source of web template which you created in last step and then save this web template.
Code :
<html>
<head>
<style>
#example1 {
background-image: url(/logo.png);
background-position: right bottom, left top;
background-repeat: no-repeat, repeat;
padding: 15px;
}
</style>
</head>
<body>
<h1>sed diam nonummy nibh euismod tincidunt</h1>
<p>Ut wisi enim ad minim veniam, quis nostrud exerci tation ullamcorper suscipit lobortis nisl ut aliquip ex ea commodo consequat:</p>
<div id="example1">
<h1>Lorem Ipsum Dolor</h1>
<p>Lorem ipsum dolor sit amet, consectetuer adipiscing elit, sed diam nonummy nibh euismod tincidunt ut laoreet dolore magna aliquam erat volutpat.</p>
<p>Ut wisi enim ad minim veniam, quis nostrud exerci tation ullamcorper suscipit lobortis nisl ut aliquip ex ea commodo consequat.</p>
</div>
</body>
</html>

Note: Most important thing is after make the changes in source panel of this web template. Don't forget to save this template. Sometime user forget to save these changes.
Step 4: Now go to Portal > Page Template.

Step 5: Create a new page template. I would suggest you, give the same name of the page template which you gave the name of web template.
Website: select the website for which you are working.
Type: type is to be web template.
Web Template: select the web template which you created in step 3.
Use website Header and Footer: Checked this option.
Entity Name: select the web page entity.

Step 6: Now go to Portal > Web Page.

Step 7: Create a new web page as shown in below snapshot. In page template field, select the page template which you created in step 5.
 Step 8 (Optional): This is optional step. I am doing this step because in my code i gave Image URL.
So to show image in portal, I have to upload image in portal server as show in below snapshot.

Step 9: Add this web page in Header's Nav Bar.

Now check open this web page in the portal.....

Click Here to know, How to add entity form in our custom web page.
Step 1: Go to Portal > Web Template.

Step 2: Create a new Web Template. Give some Name and Select the website for which you are doing this.

Step 3: Now copy the below code and paste it in source of web template which you created in last step and then save this web template.
Code :
<html>
<head>
<style>
#example1 {
background-image: url(/logo.png);
background-position: right bottom, left top;
background-repeat: no-repeat, repeat;
padding: 15px;
}
</style>
</head>
<body>
<h1>sed diam nonummy nibh euismod tincidunt</h1>
<p>Ut wisi enim ad minim veniam, quis nostrud exerci tation ullamcorper suscipit lobortis nisl ut aliquip ex ea commodo consequat:</p>
<div id="example1">
<h1>Lorem Ipsum Dolor</h1>
<p>Lorem ipsum dolor sit amet, consectetuer adipiscing elit, sed diam nonummy nibh euismod tincidunt ut laoreet dolore magna aliquam erat volutpat.</p>
<p>Ut wisi enim ad minim veniam, quis nostrud exerci tation ullamcorper suscipit lobortis nisl ut aliquip ex ea commodo consequat.</p>
</div>
</body>
</html>

Step 4: Now go to Portal > Page Template.

Step 5: Create a new page template. I would suggest you, give the same name of the page template which you gave the name of web template.
Website: select the website for which you are working.
Type: type is to be web template.
Web Template: select the web template which you created in step 3.
Use website Header and Footer: Checked this option.
Entity Name: select the web page entity.

Step 6: Now go to Portal > Web Page.

Step 7: Create a new web page as shown in below snapshot. In page template field, select the page template which you created in step 5.

So to show image in portal, I have to upload image in portal server as show in below snapshot.

Step 9: Add this web page in Header's Nav Bar.

Now check open this web page in the portal.....

3 comments:
Dealer Clusters in Gurugram
Market Index in Mumbai
Sales Opportunities in Mumbai
Category sales in Mumbai
We Website Designing Company in Chicago, Build User & SEO Friendly websites with customized features and designs all according to the needs and requirements of our clients.
Thanks for sharing with us useable information.
Digital marketing agencies
Post a Comment